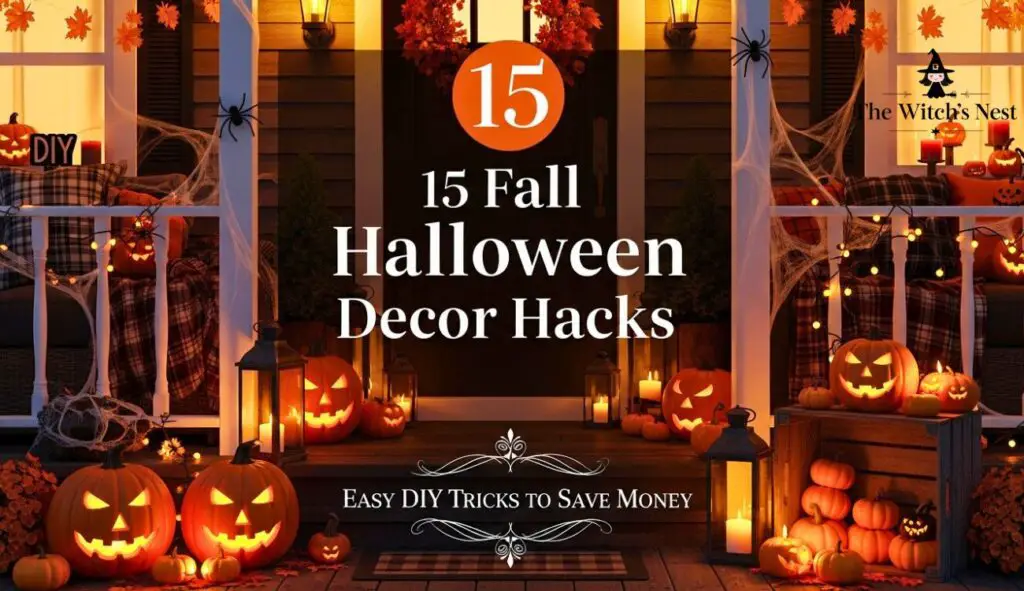
Fall Halloween Decor Hacks: 15 Easy DIY Tricks to Save Money
Have you ever felt that little sting in your wallet when walking through the Halloween aisle at your favorite store? Those gorgeous fall wreaths, spooky lanterns, and cute little ghosts all look tempting—but the price tags? Not so much. Here’s the truth: you don’t need to spend a fortune to make your home look Halloween-ready and fall-fabulous.
A few years ago, I was planning a Halloween get-together at my place. The budget was tight, but the Pinterest boards were overflowing with dreamy ideas. So instead of splurging, I got crafty. I repurposed what I had, used things from nature, and let my inner DIY queen shine. The result? My guests couldn’t believe I hadn’t spent hundreds on decorations.
So today, I’m opening up my treasure chest of tried-and-true Halloween and fall decor hacks—all easy, budget-friendly, and totally doable, even if you’re not a DIY pro. You’ll get 15 fun tricks to save money and make your space look like autumn magic just blew through your door.
💡 The #1 Tip: Use What You Already Have
Before you even think about shopping, take a little “treasure hunt” around your home. You’d be surprised at how many everyday items can be transformed into spooky or cozy fall décor:
Empty jars
Toilet paper rolls
Cardboard boxes
Old clothes or sheets
Glass bottles
Twigs and dry leaves from the yard
With just a little imagination, almost anything can become Halloween gold.
🎭 15 Easy DIY Halloween Decor Hacks (That Also Work for Fall)
Let’s dive into the step-by-step magic. These aren’t just cute—they’re clever, quick, and will help you stretch your budget further (while making your house look like a Halloween dream).
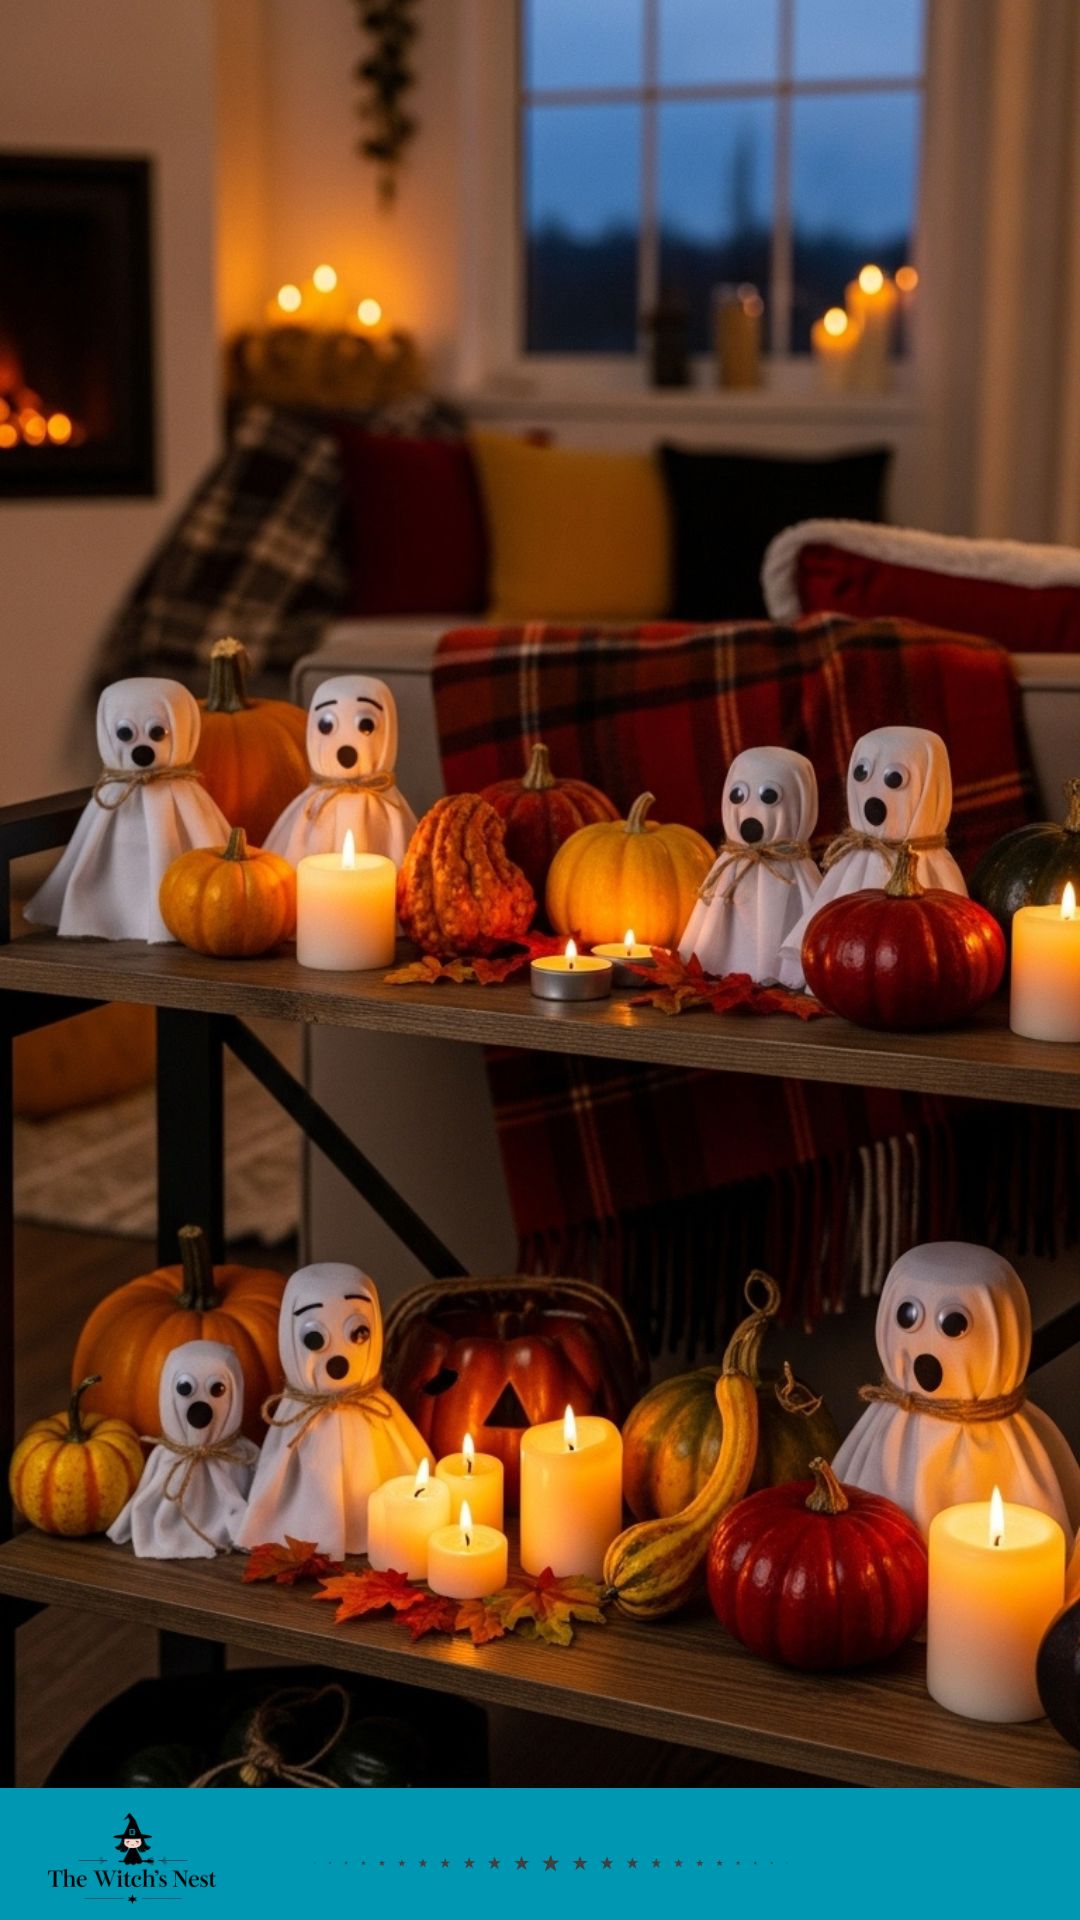
1. Toilet Paper Ghosts
Simple, cute, and recyclable. These ghosts are perfect for your mantel or shelves.
You’ll need: toilet paper rolls, white tissue or fabric, black marker, string.
Steps:
Drape white tissue or fabric over the roll.
Tie it around the “neck” with string.
Draw spooky or silly ghost faces.
Group them together for a ghostly scene.
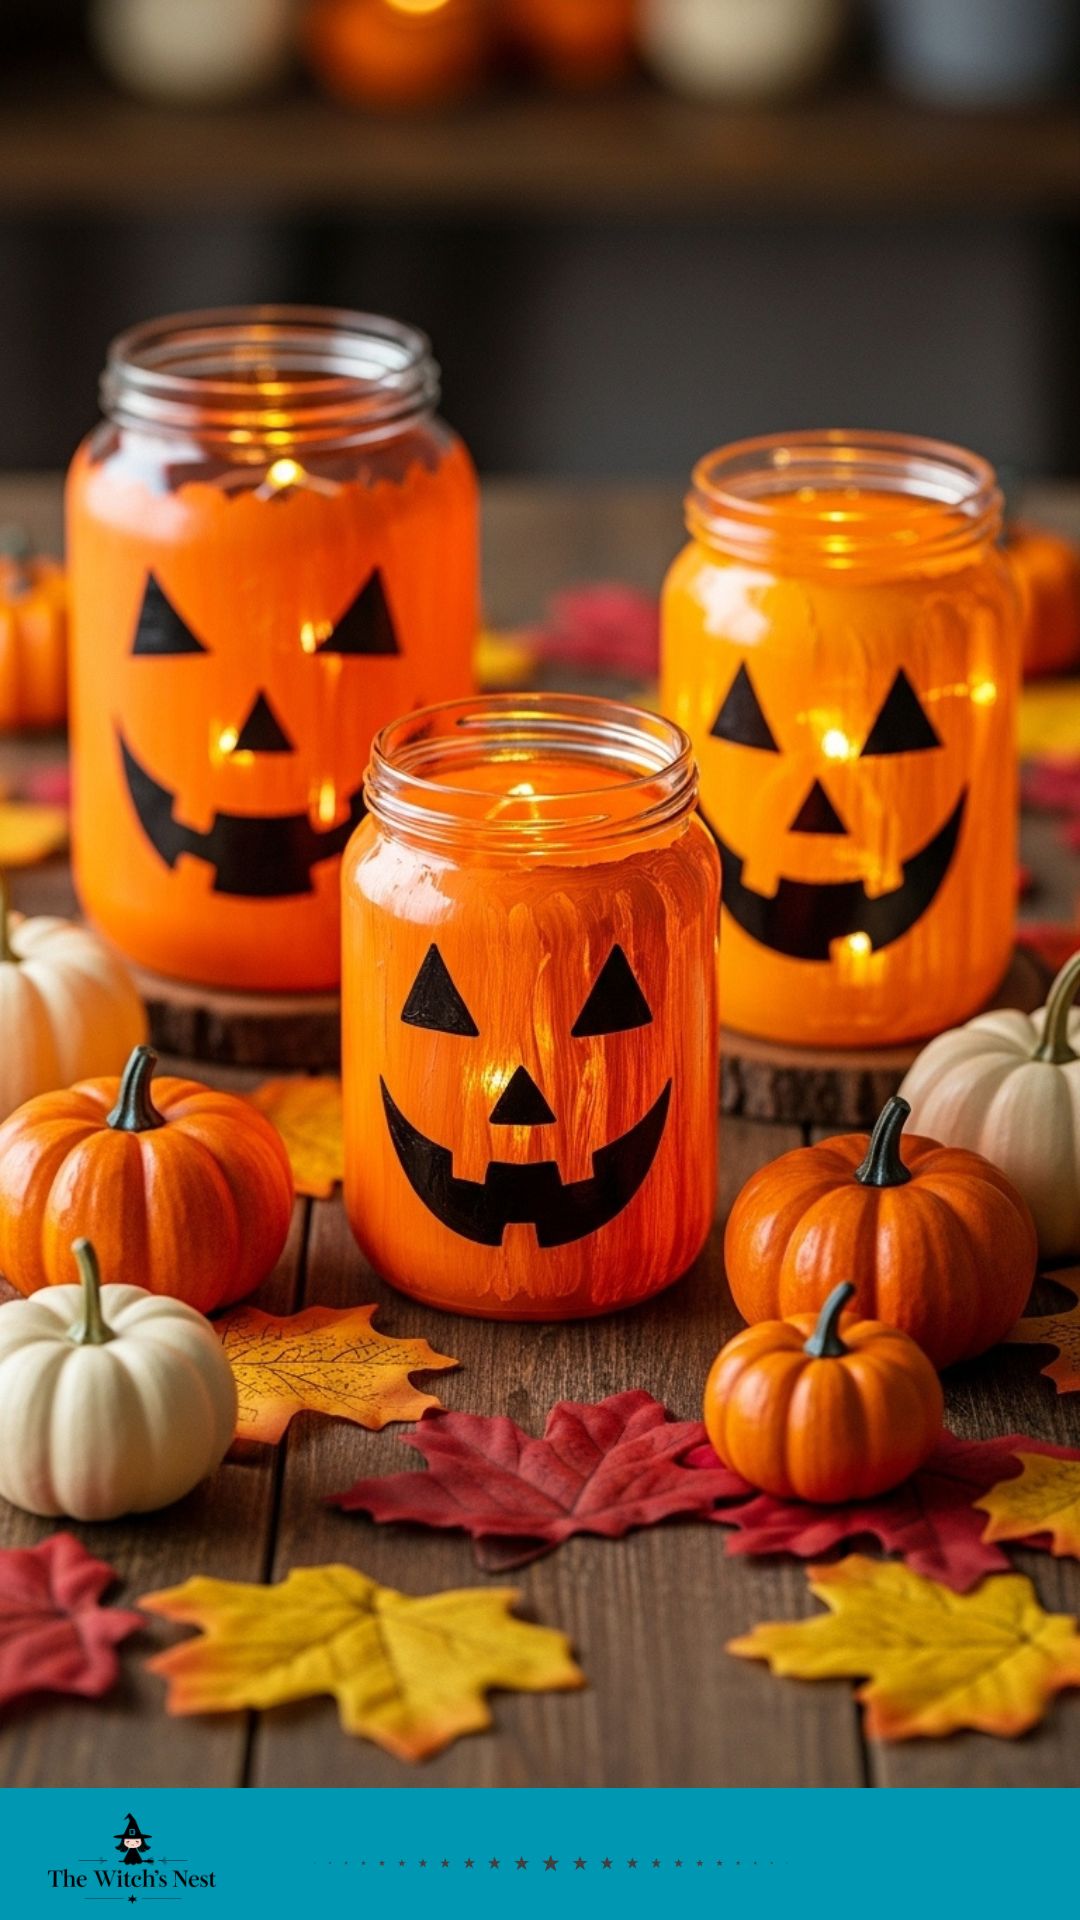
2. Pumpkin Lanterns from Old Jars
Create the perfect Halloween glow without buying fancy lights.
You’ll need: empty glass jars, orange tissue paper or paint, black paper, glue, LED tealights.
Steps:
Wrap or paint jars orange.
Cut jack-o’-lantern faces from black paper and glue them on.
Place LED tealight inside and light it up!
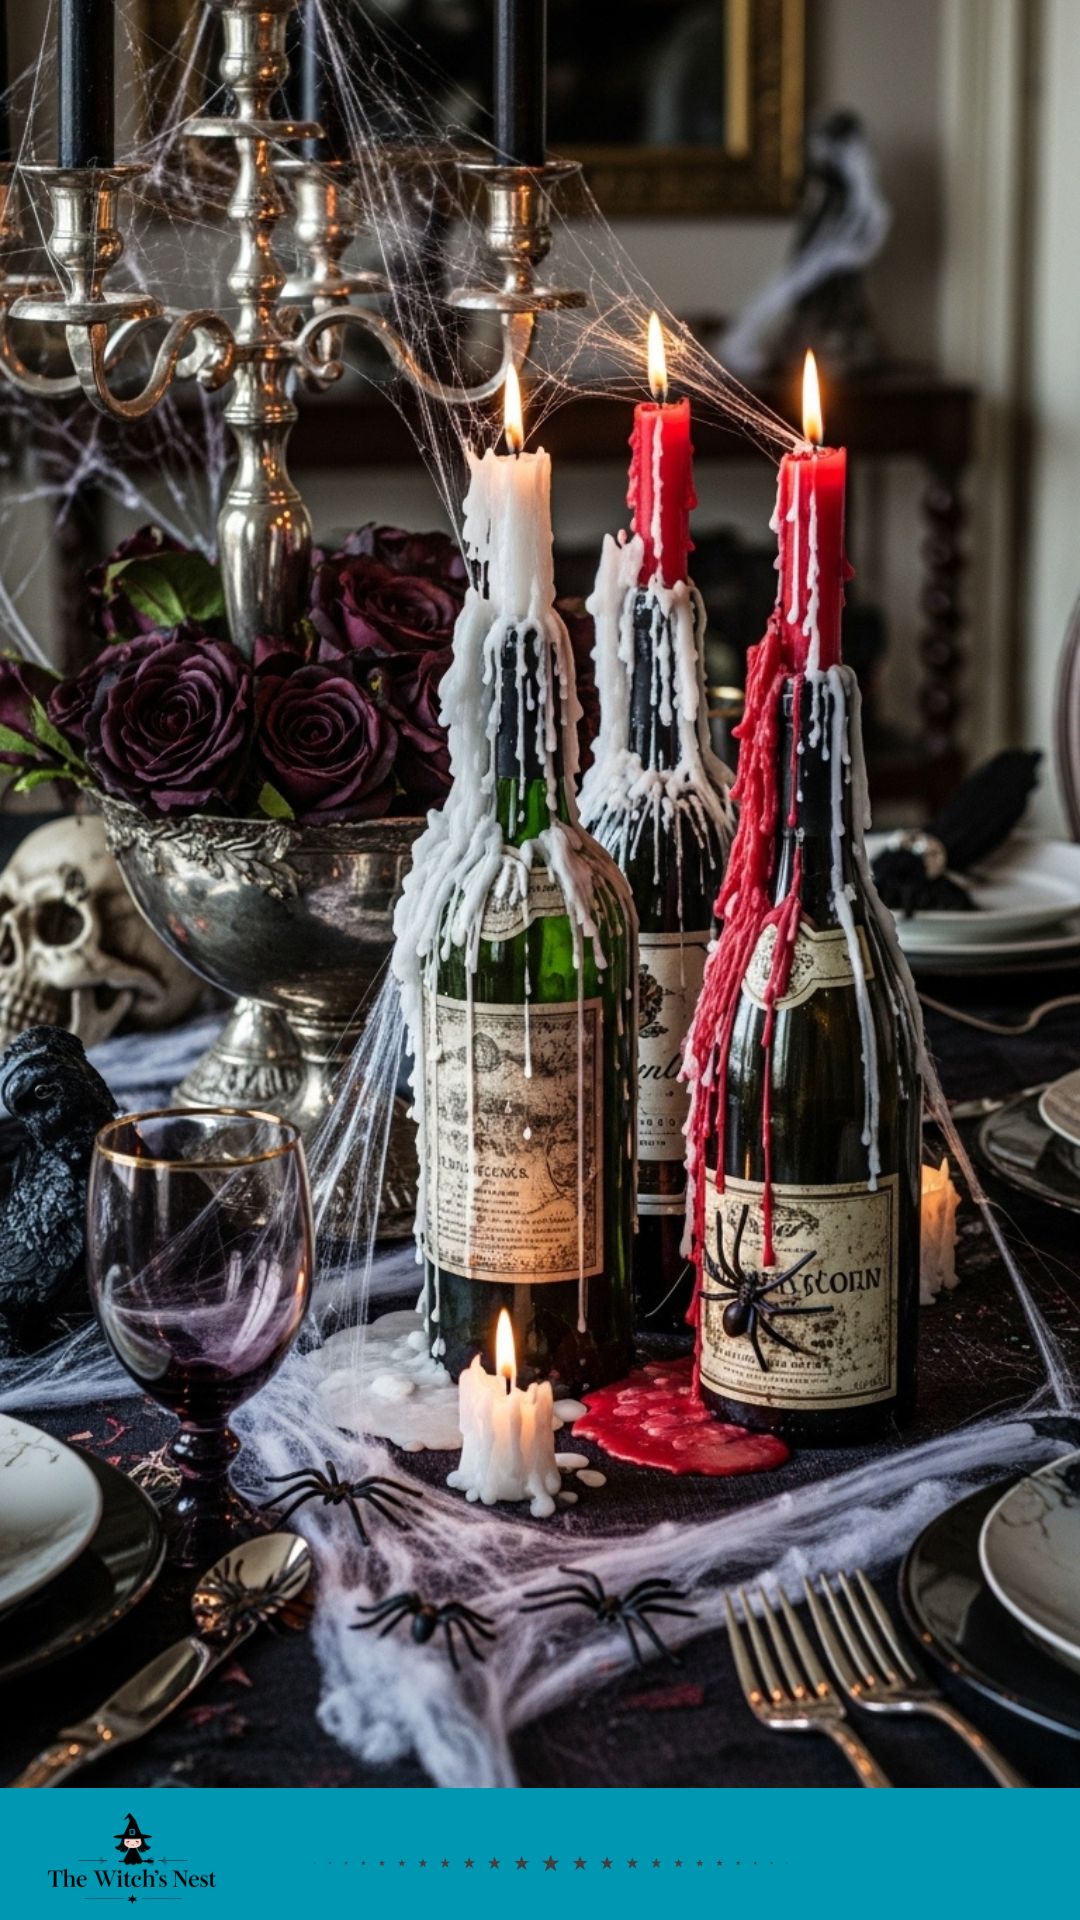
3. Creepy Candle Bottles
Gothic and dramatic. These look amazing on dining tables or shelves.
You’ll need: empty wine bottles, white candles, red candle (optional).
Steps:
Clean and dry the bottles.
Place a candle inside each bottle opening.
Let wax drip naturally for a haunted look.
Drip red wax for a “bloody” effect.
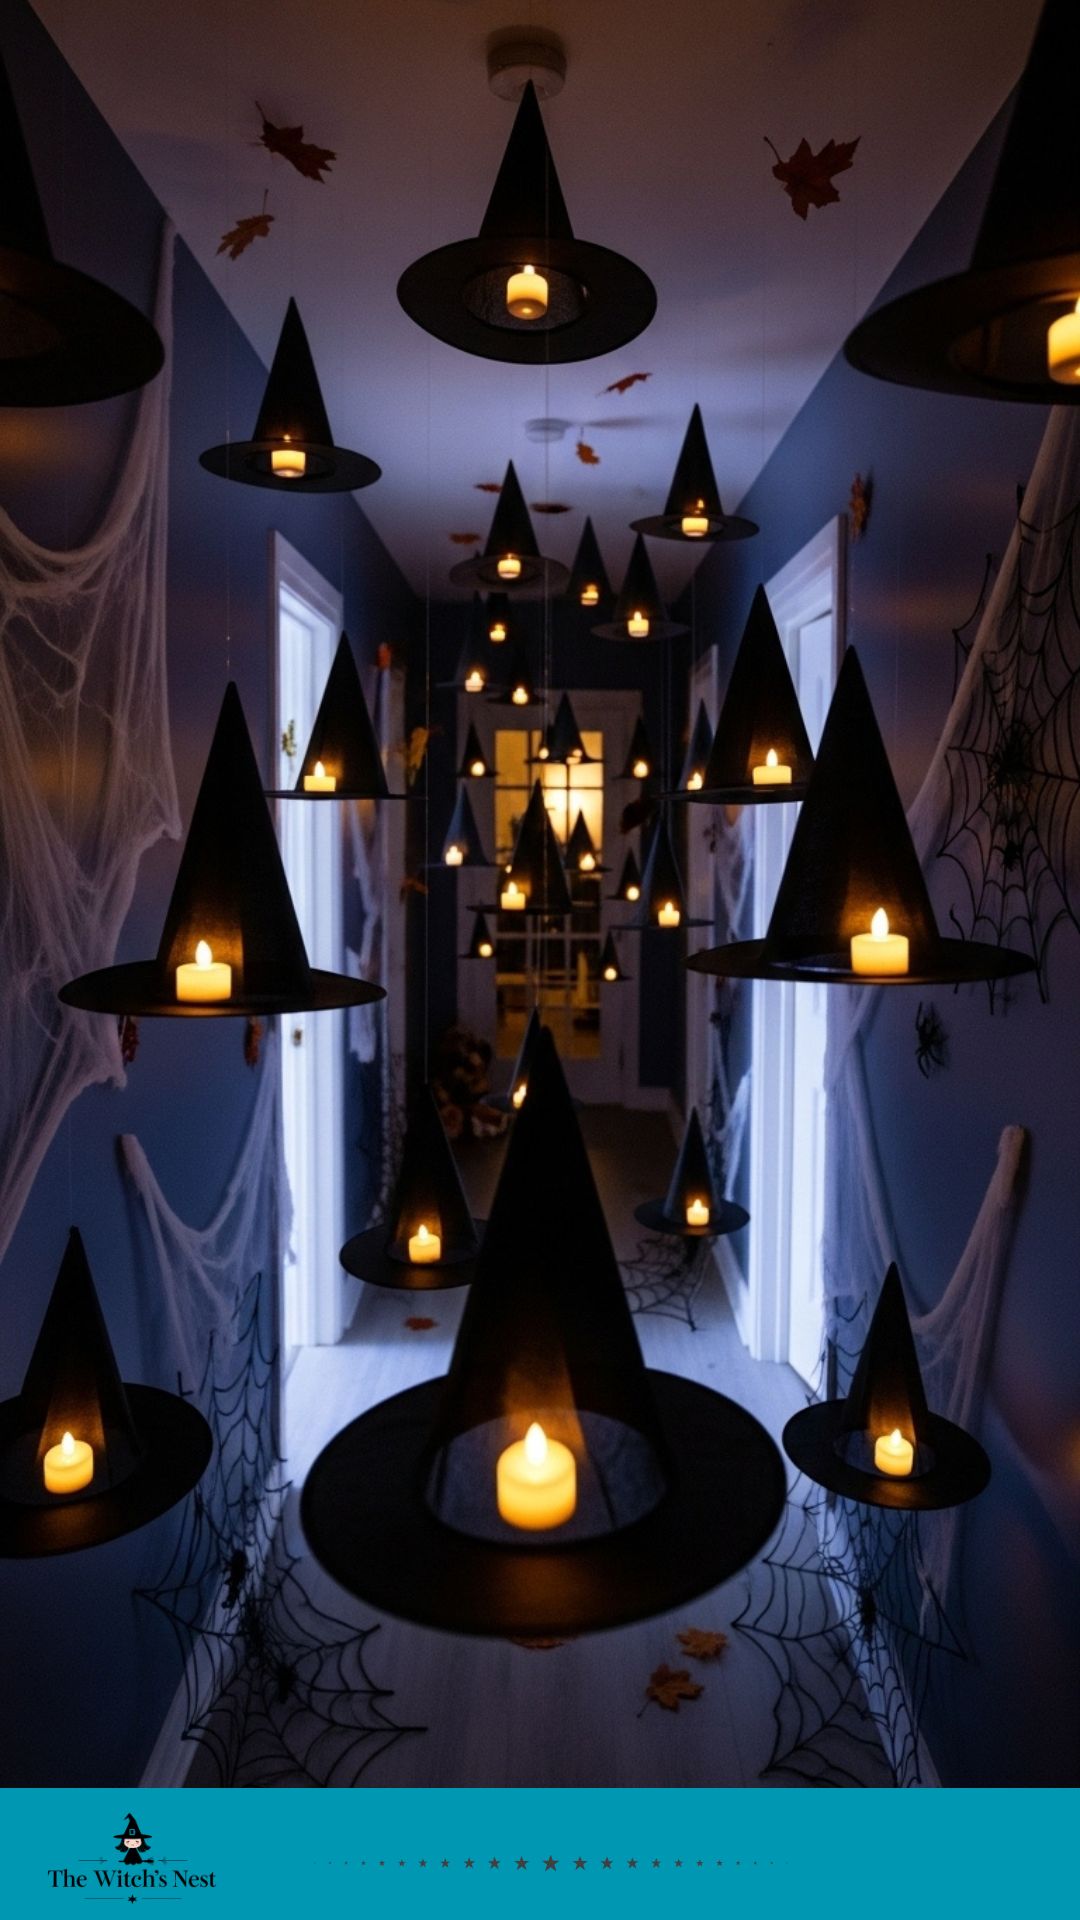
4. Floating Witch Hats
So easy, so fun—these hats literally float above your guests.
You’ll need: cheap witch hats, fishing line, push pins, battery tealights.
Steps:
Attach tealights inside the hats with tape or glue.
Tie fishing line through the top of each hat.
Hang from ceiling using pins or hooks.
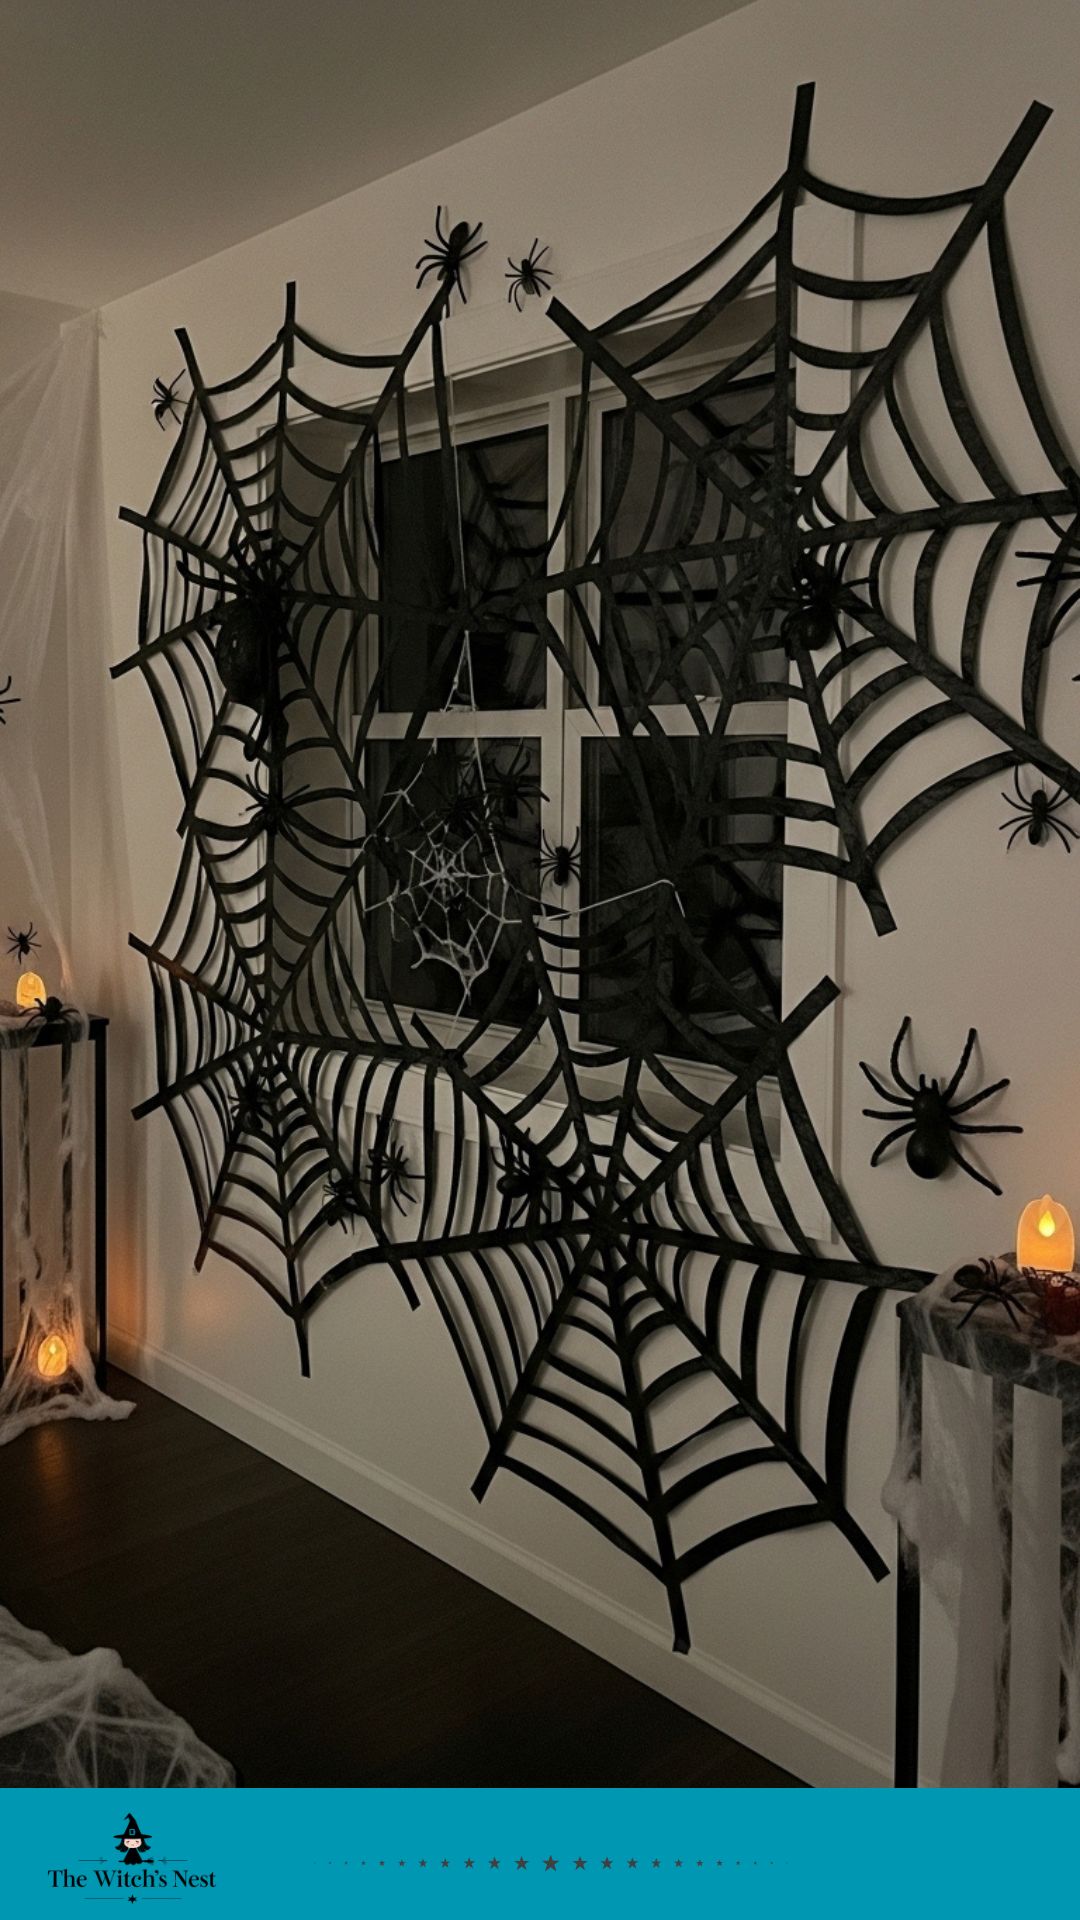
5. Trash Bag Spider Webs
Big décor, tiny cost.
You’ll need: large black trash bags, scissors, tape.
Steps:
Flatten and fold the trash bag into a triangle.
Cut shapes like making paper snowflakes—but in spider web patterns.
Unfold and tape to windows or walls.
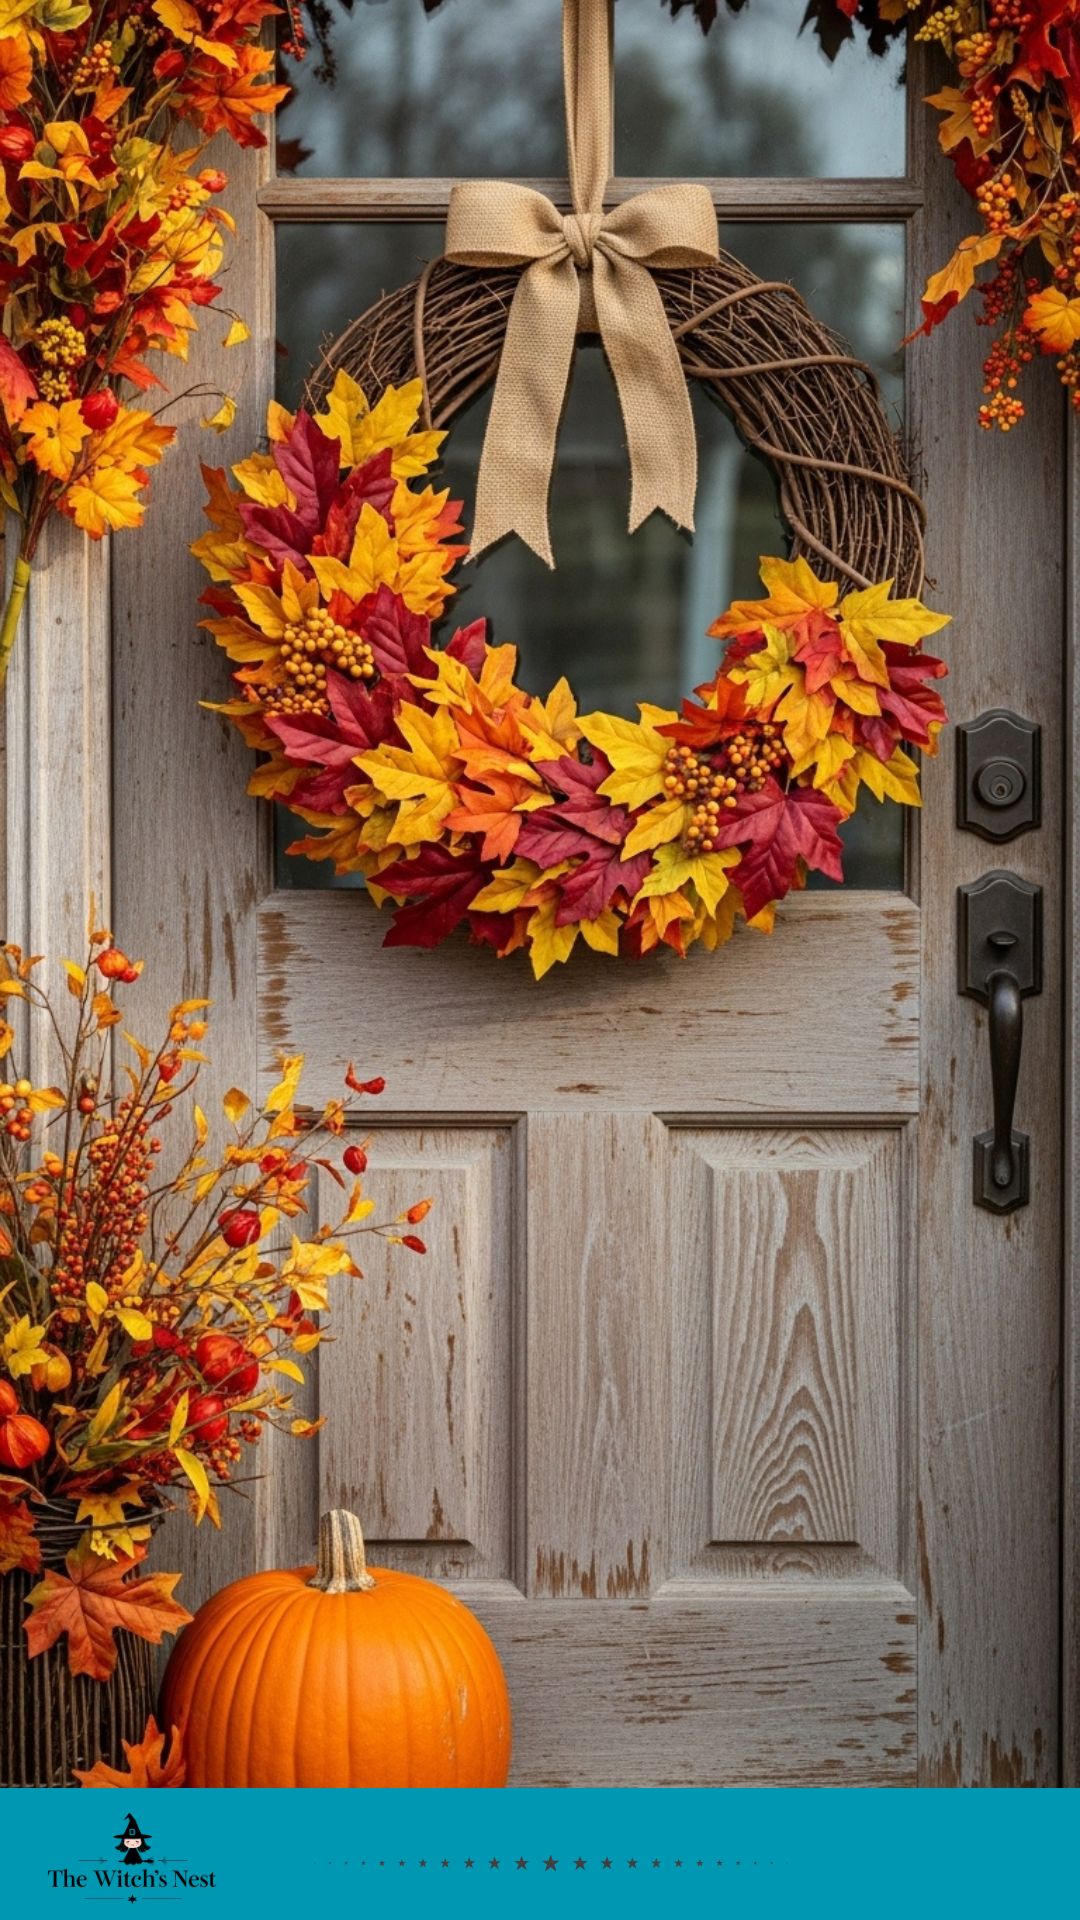
6. Twiggy Wreaths
Bring the outdoors in, and keep it rustic.
You’ll need: twigs, hot glue, ribbon, fake leaves or berries.
Steps:
Form a wreath shape with twigs and secure with glue or wire.
Decorate with leaves, ribbons, or small pumpkins.
Hang on the door or wall.
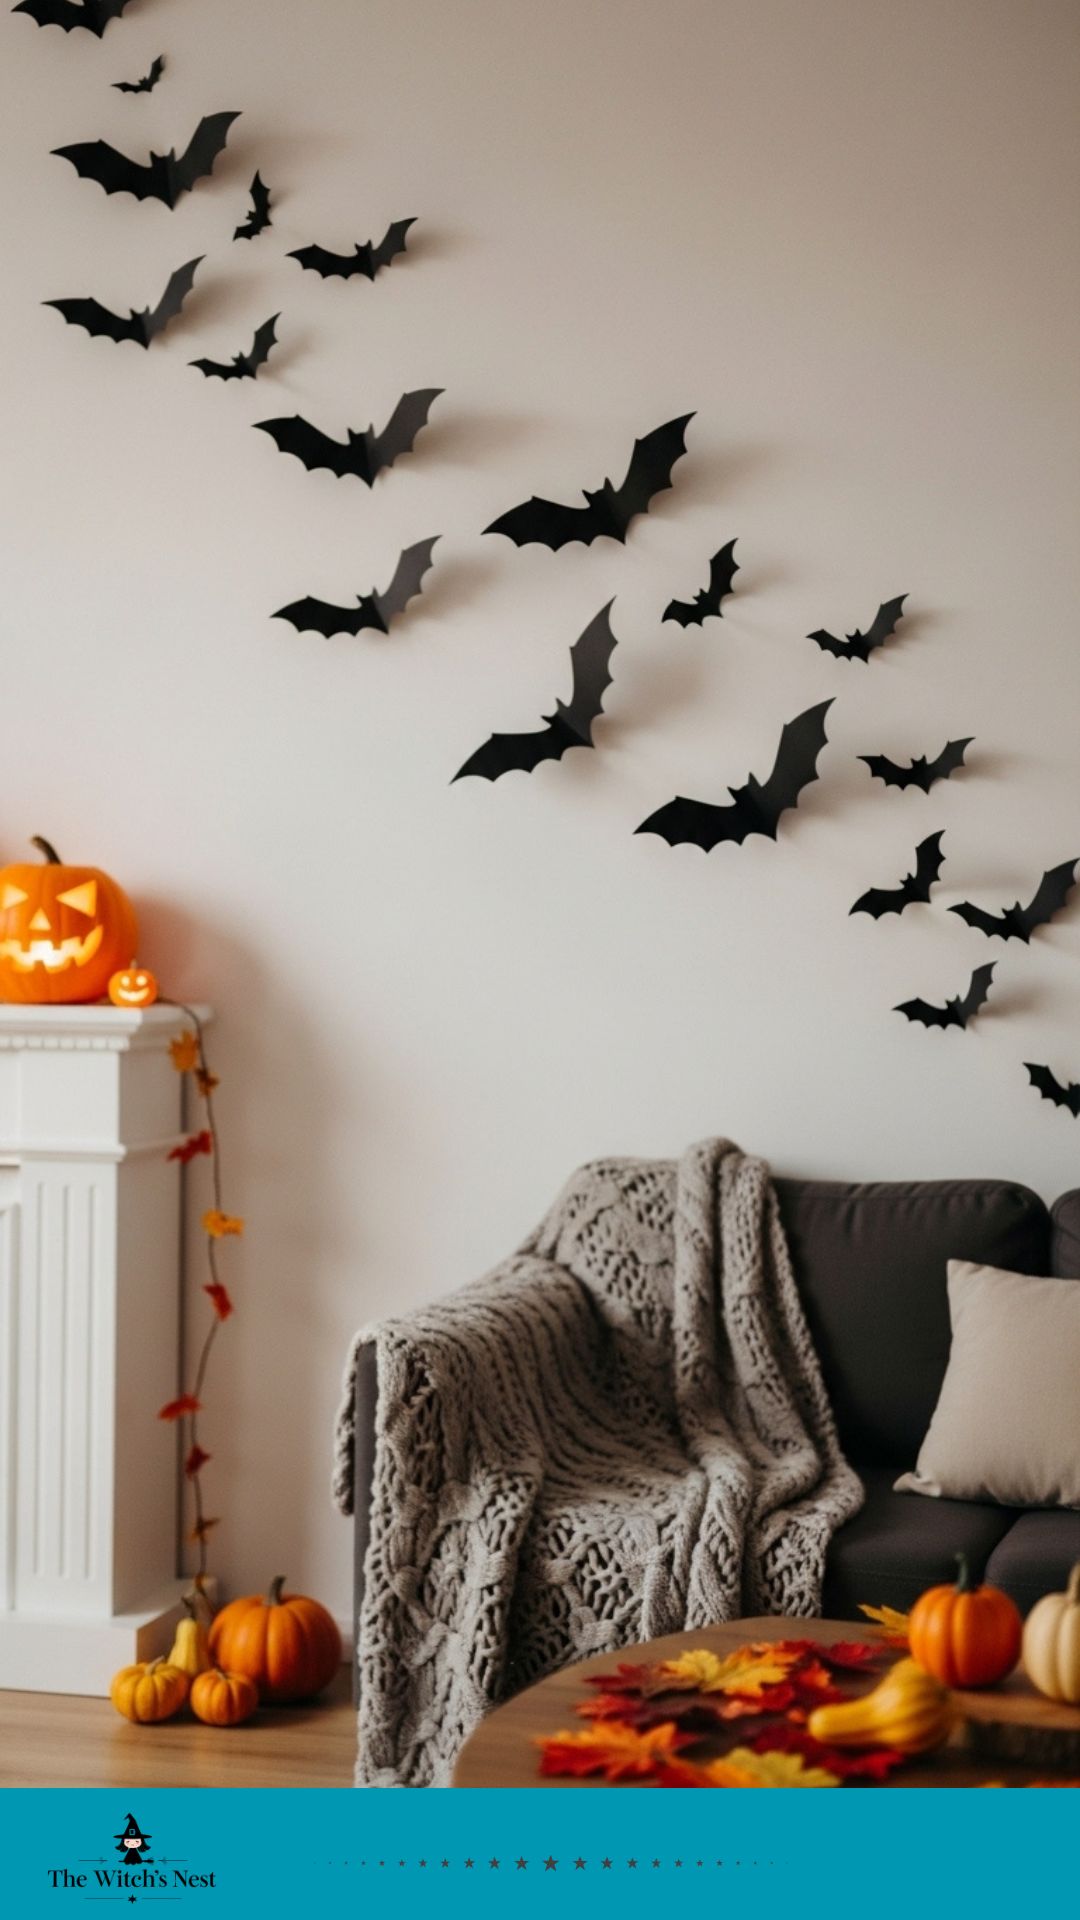
7. Paper Bats on the Wall
Perfect for blank spaces that need spooky drama.
You’ll need: black construction paper, scissors, tape.
Steps:
Trace and cut out bat shapes (search printable bat templates online).
Fold wings slightly to give dimension.
Tape flying across the wall or over door frames.
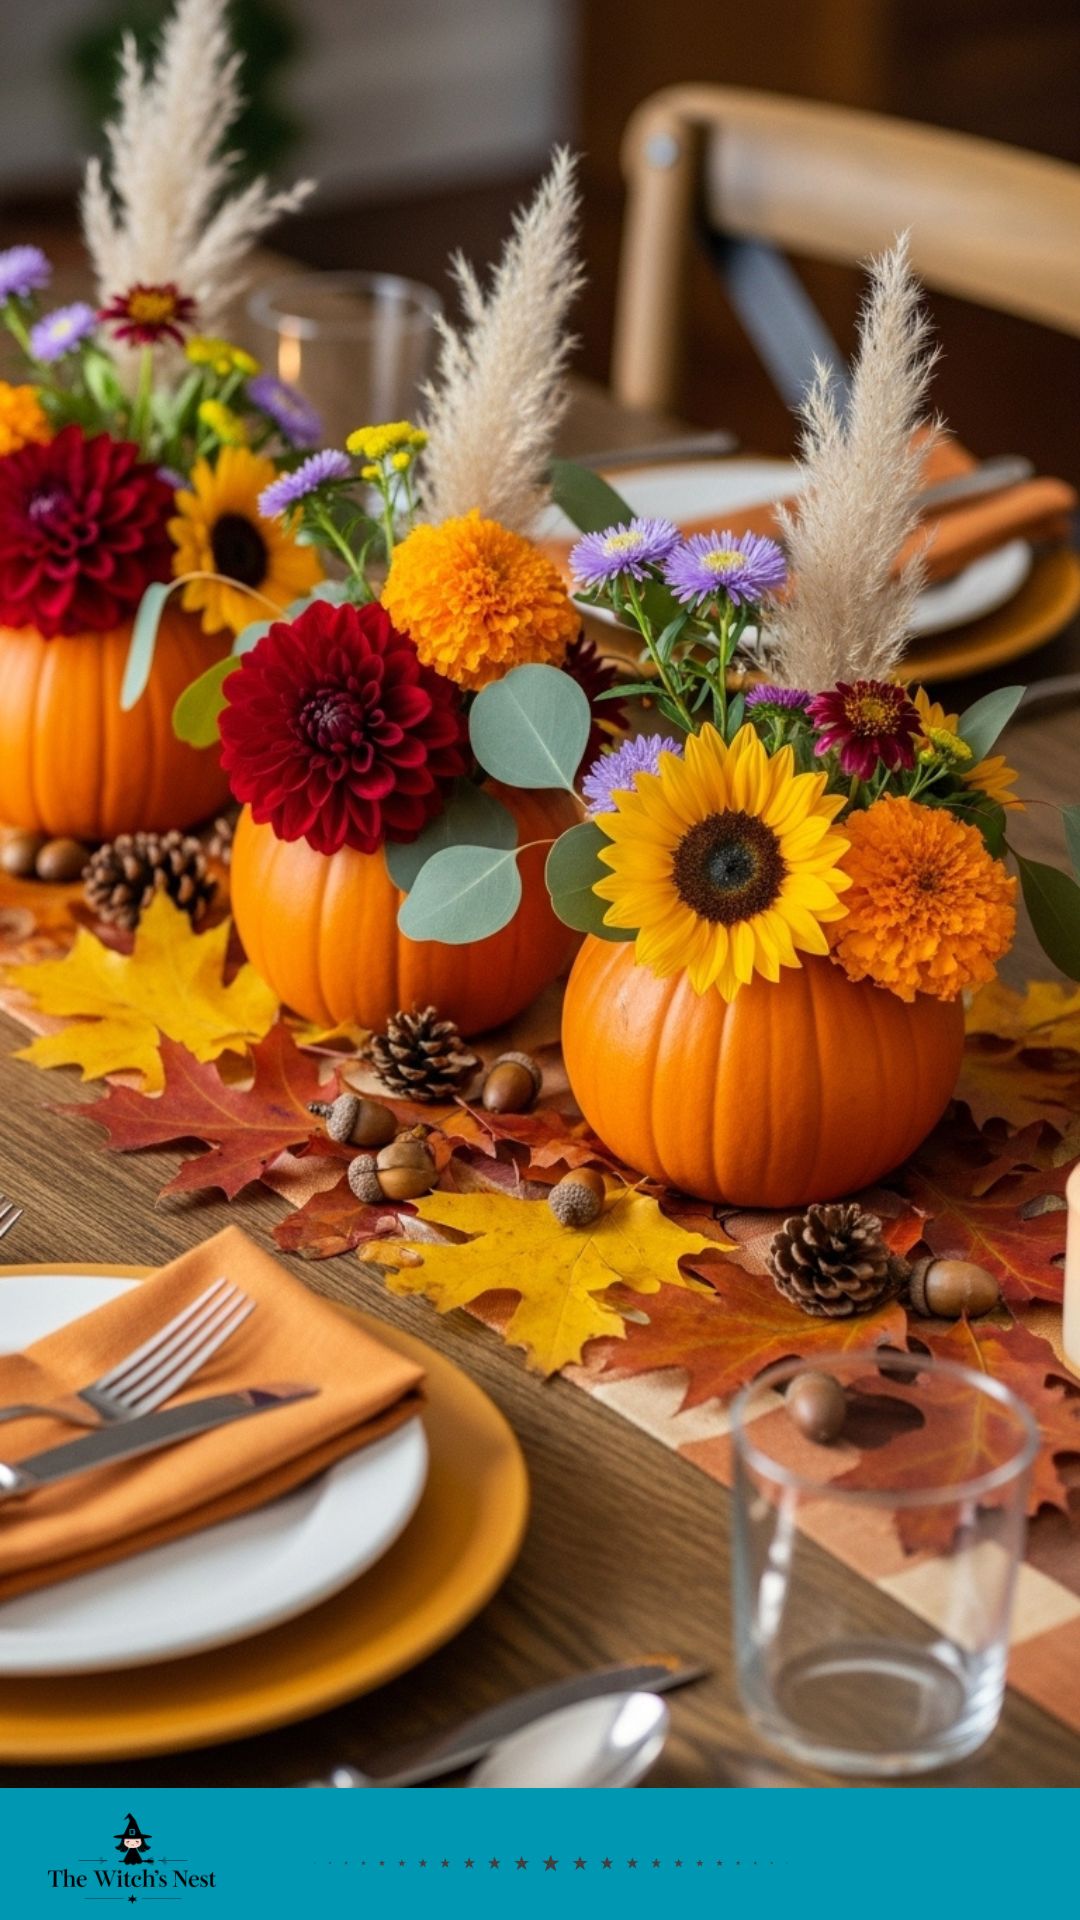
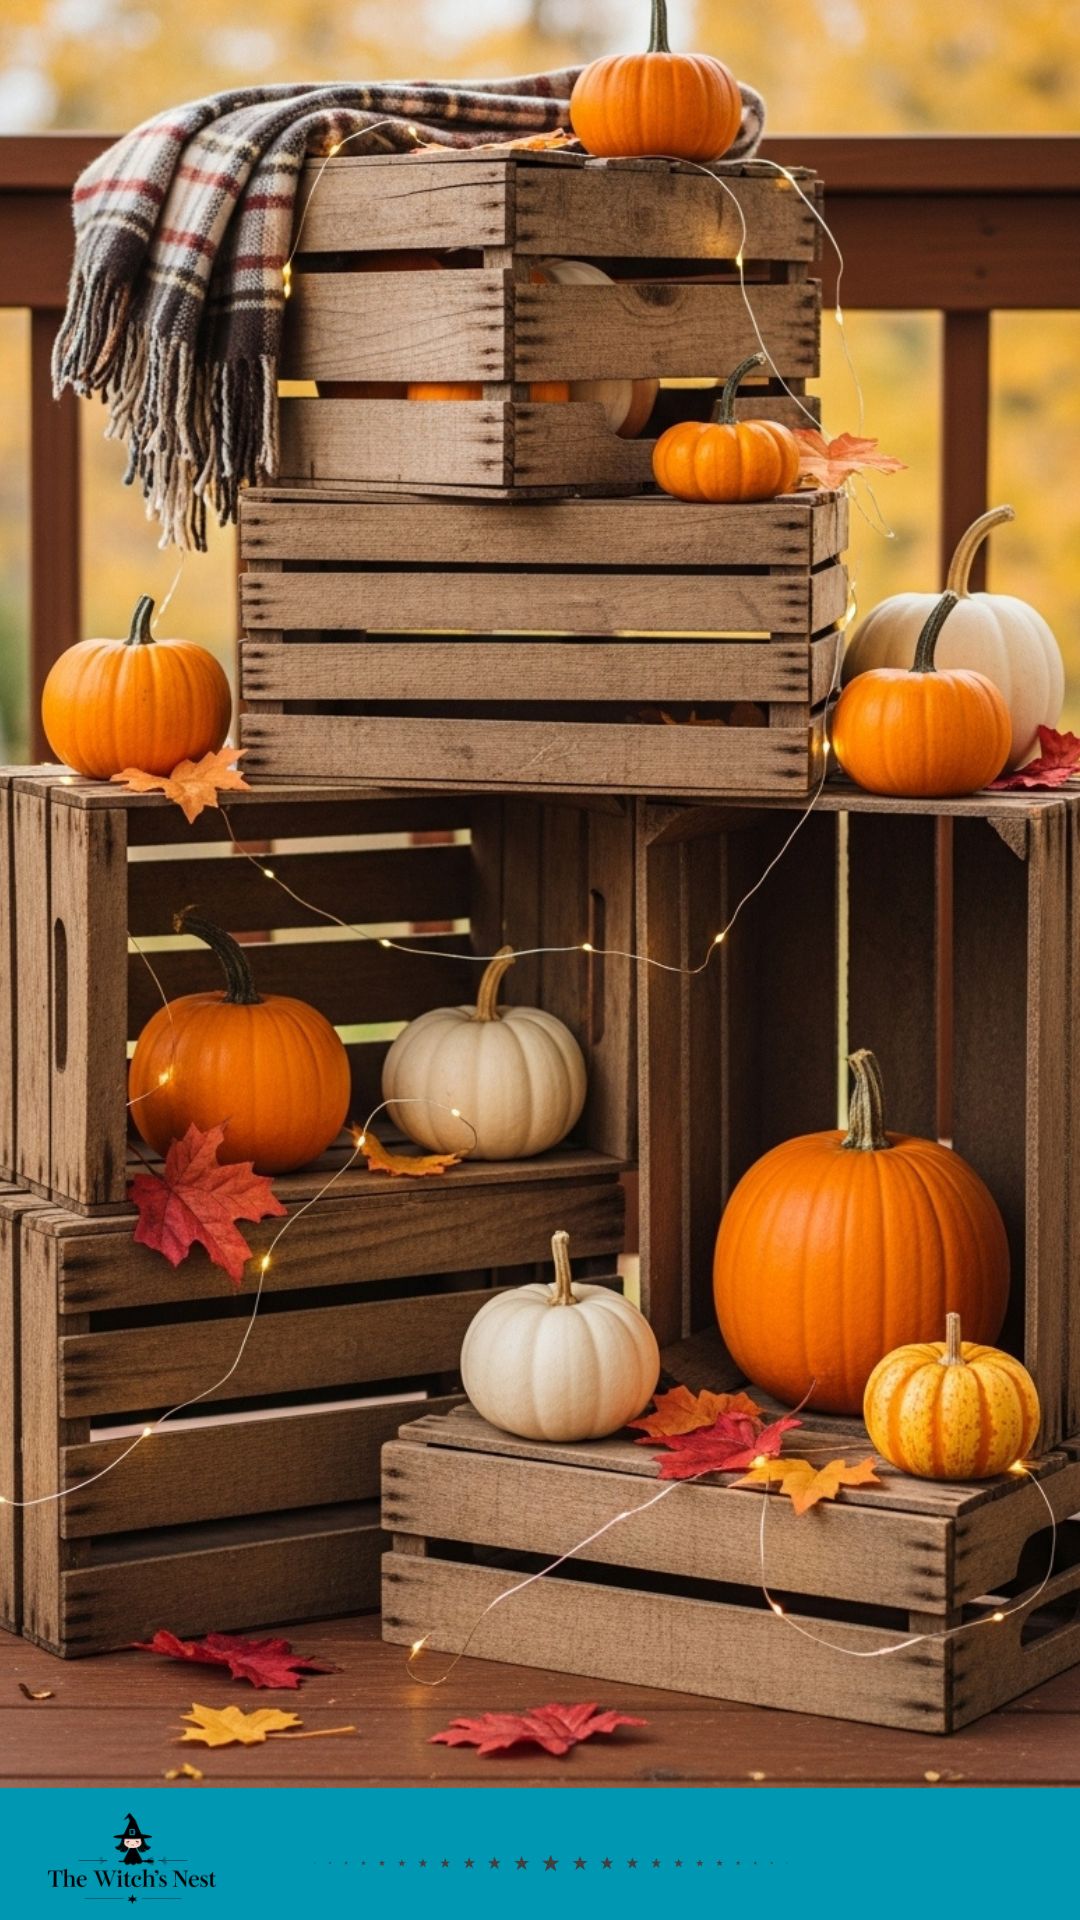
8. Pumpkin Vase Centerpieces
Chic and seasonal.
You’ll need: small pumpkins, knife, spoon, floral foam, flowers.
Steps:
Cut the top off the pumpkin and hollow it.
Place floral foam inside.
Insert fall flowers (fresh or fake).
Display as a centerpiece.
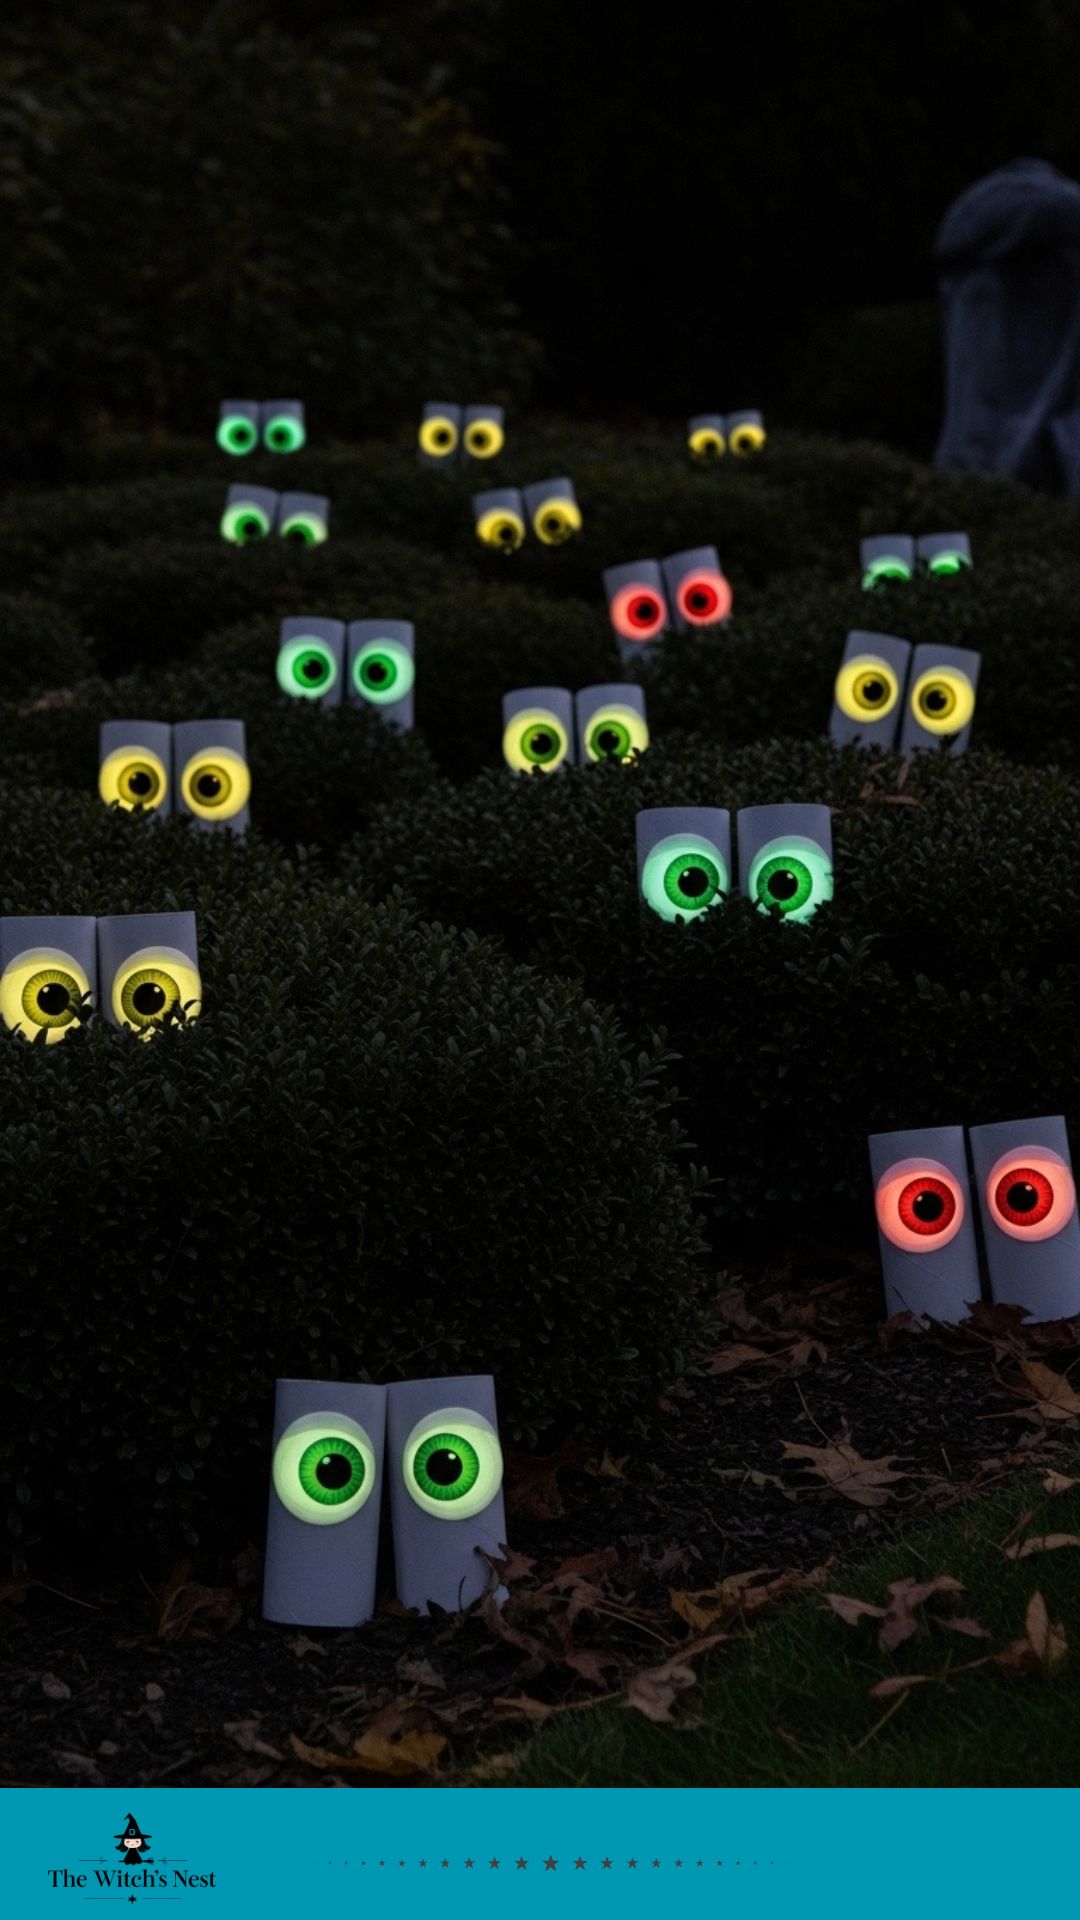
9. Glowing Eyes in the Bushes
Creepy for yard décor—kids love it.
You’ll need: toilet paper rolls, scissors, glow sticks, tape.
Steps:
Cut out creepy eye shapes in the rolls.
Place a glow stick inside each.
Tape shut and hide in bushes at night.
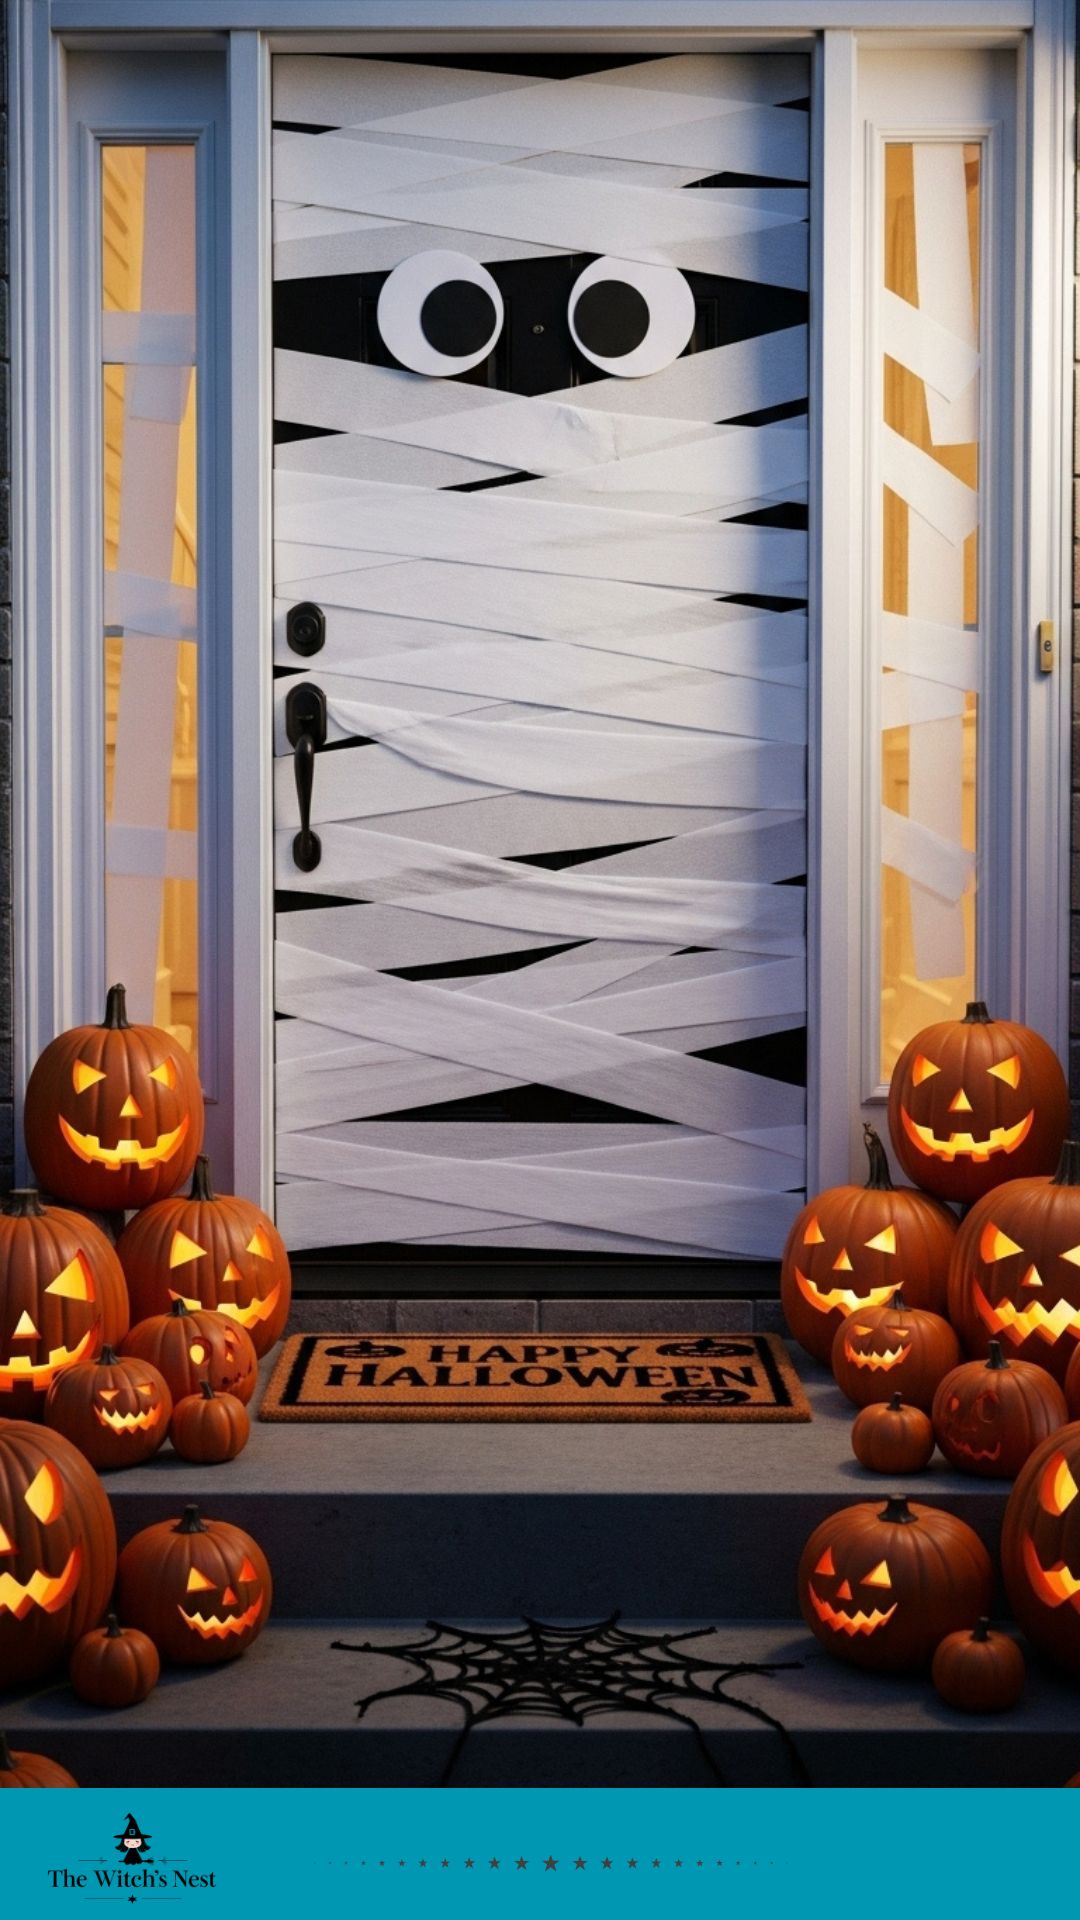
10. Mummy Door
Instant costume for your front door.
You’ll need: white streamers or toilet paper, black paper.
Steps:
Wrap your door with white streamers.
Cut and glue on large black eyes.
Add a “Happy Halloween” sign if you like.
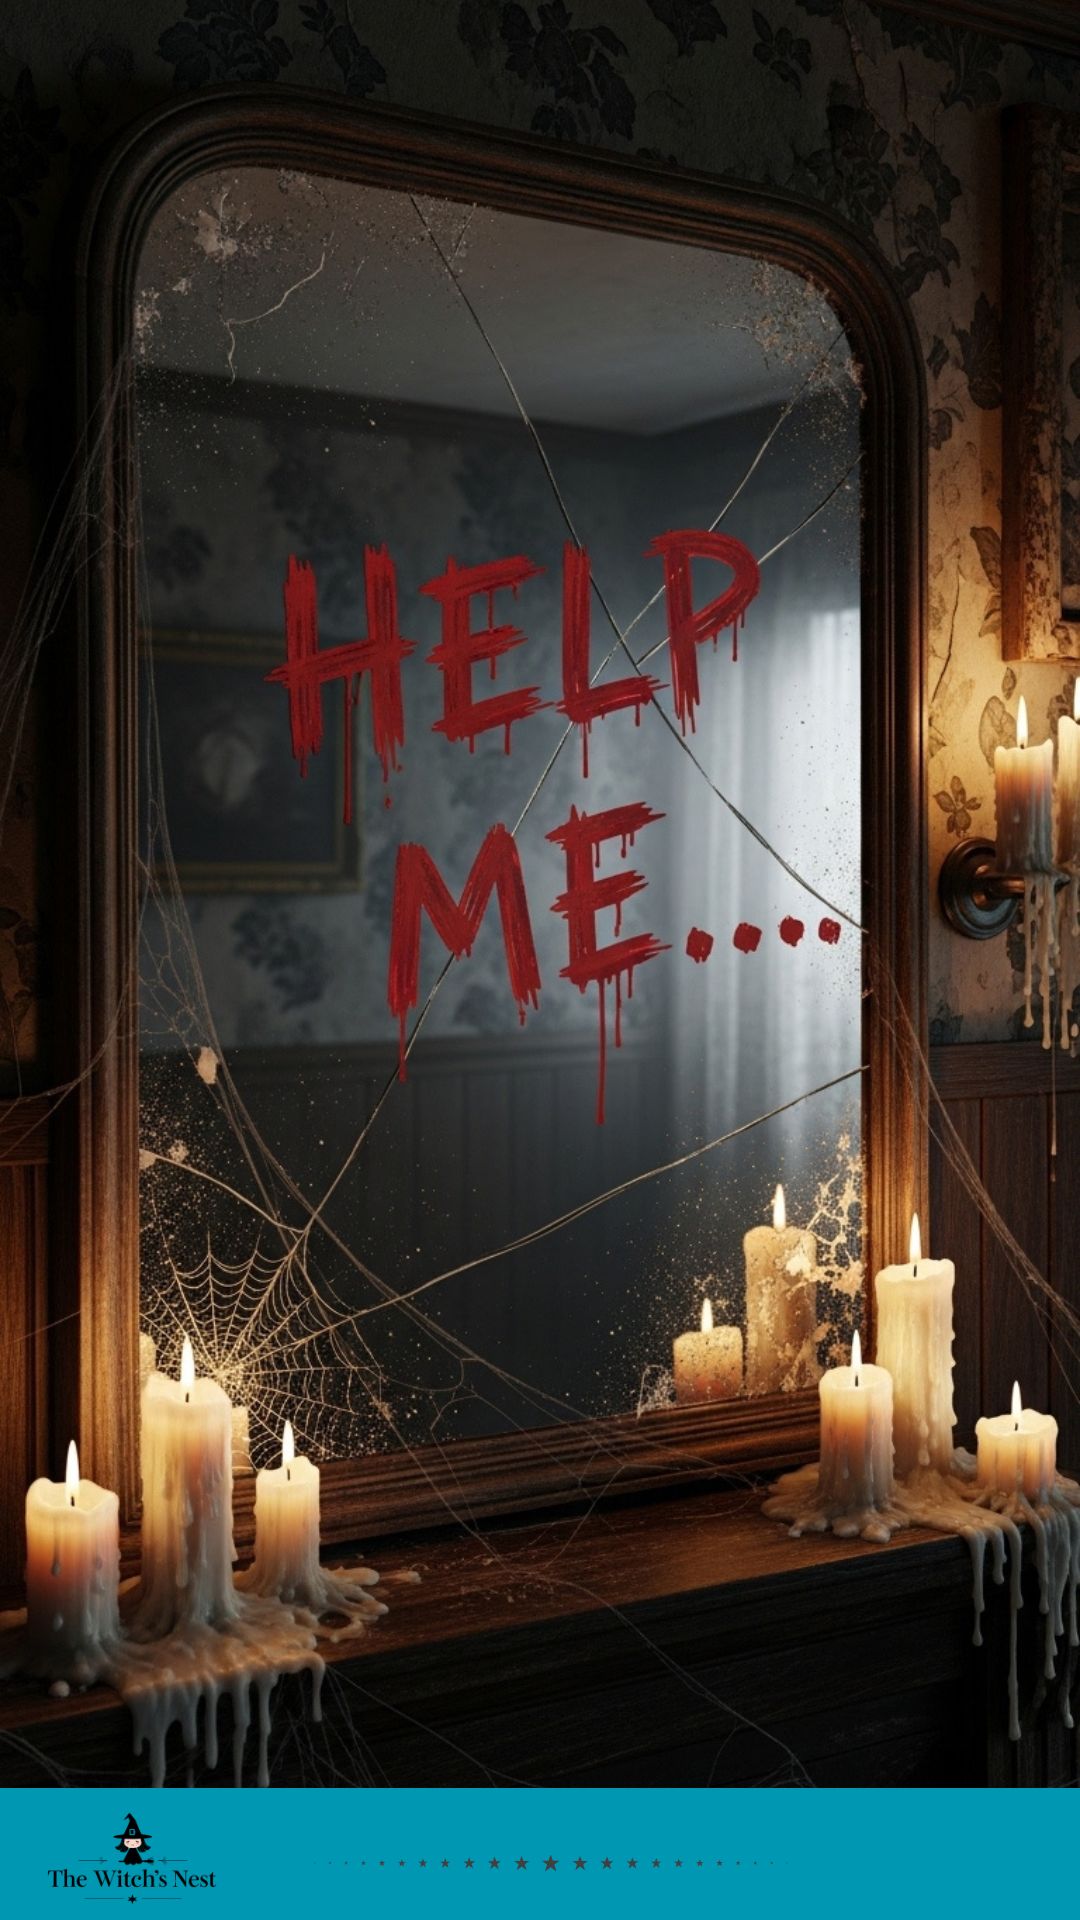
11. Gothic Mirror Messages
Haunted mansion vibes.
You’ll need: mirrors, red lipstick or white paint, damp cloth.
Steps:
Write spooky messages on the mirror (e.g., “Help me…”).
Smudge slightly with cloth for effect.
Add cobwebs around the mirror.
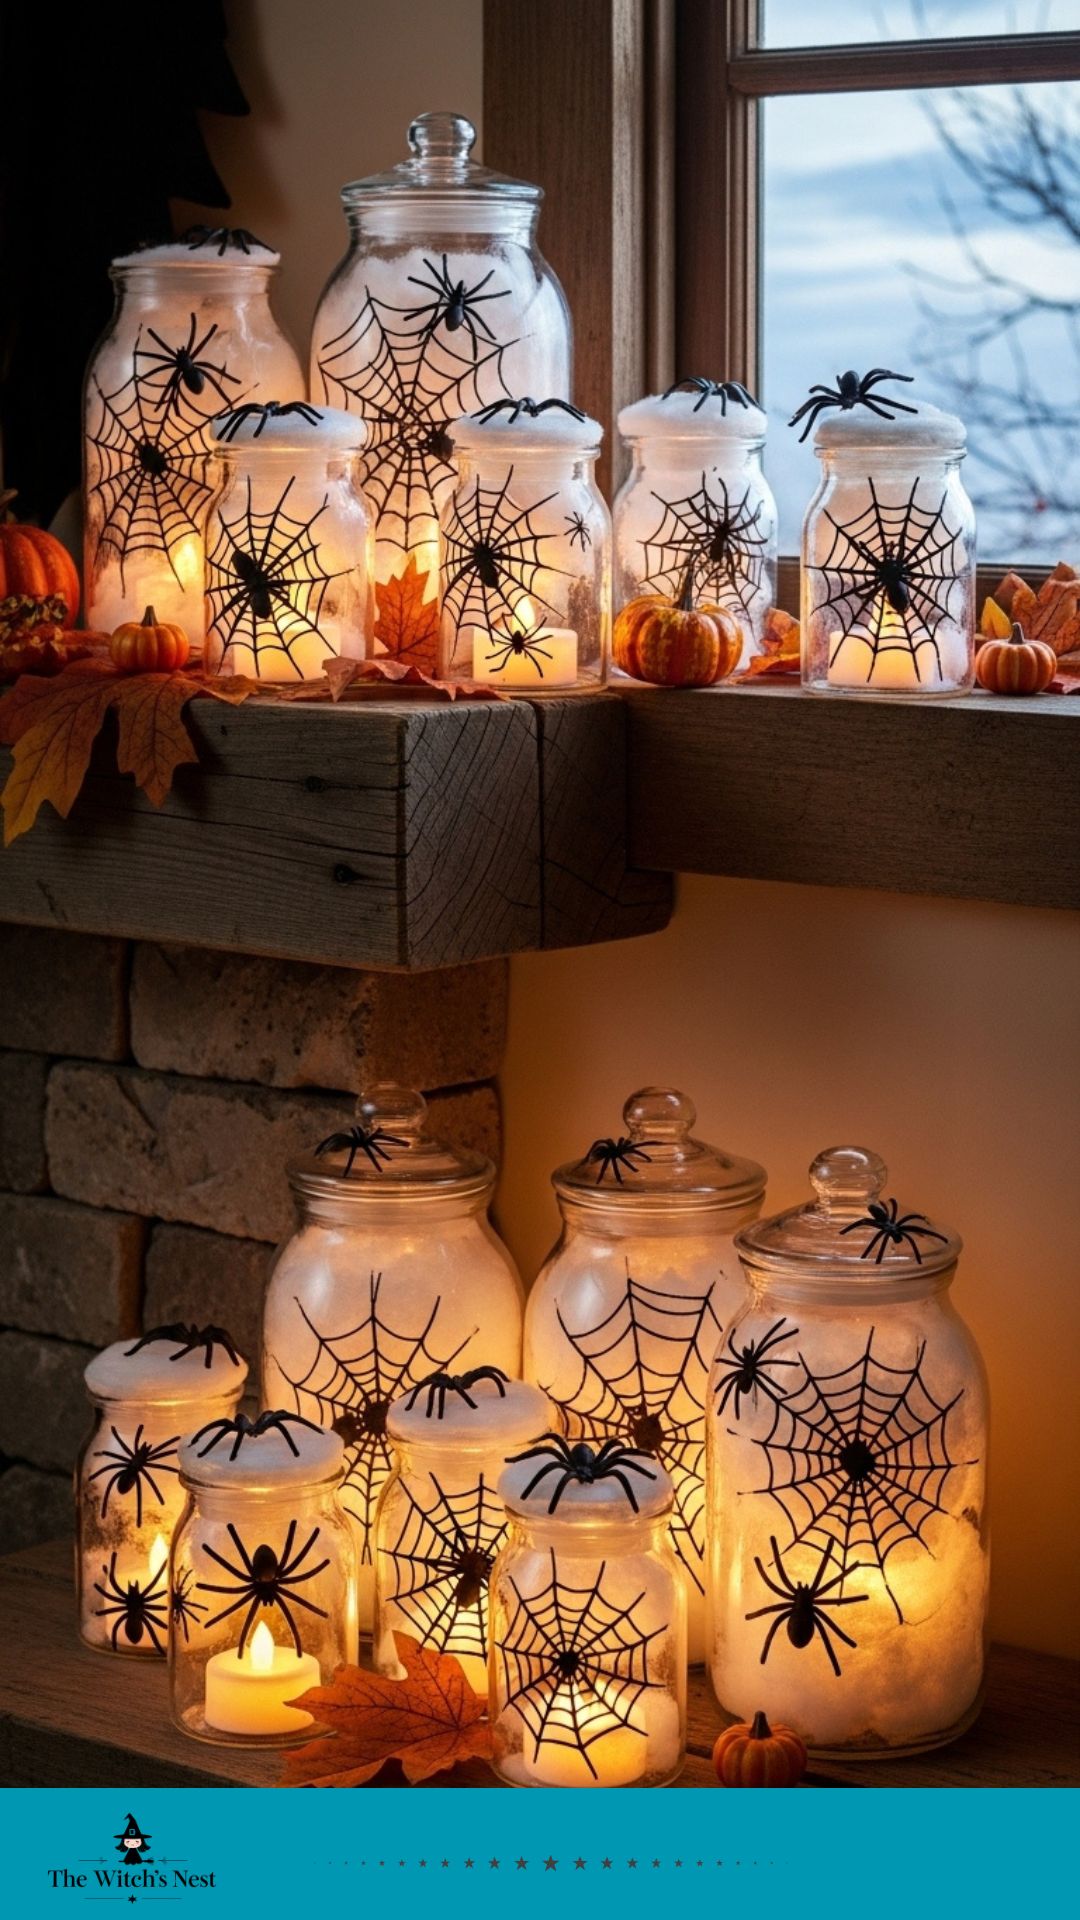
12. Candle Jars with Spiderwebs
Perfect for mantels and window sills.
You’ll need: small jars, cotton balls, plastic spiders, LED lights.
Steps:
Pull apart cotton to make cobwebs.
Place inside jar with plastic spiders.
Add an LED tealight.
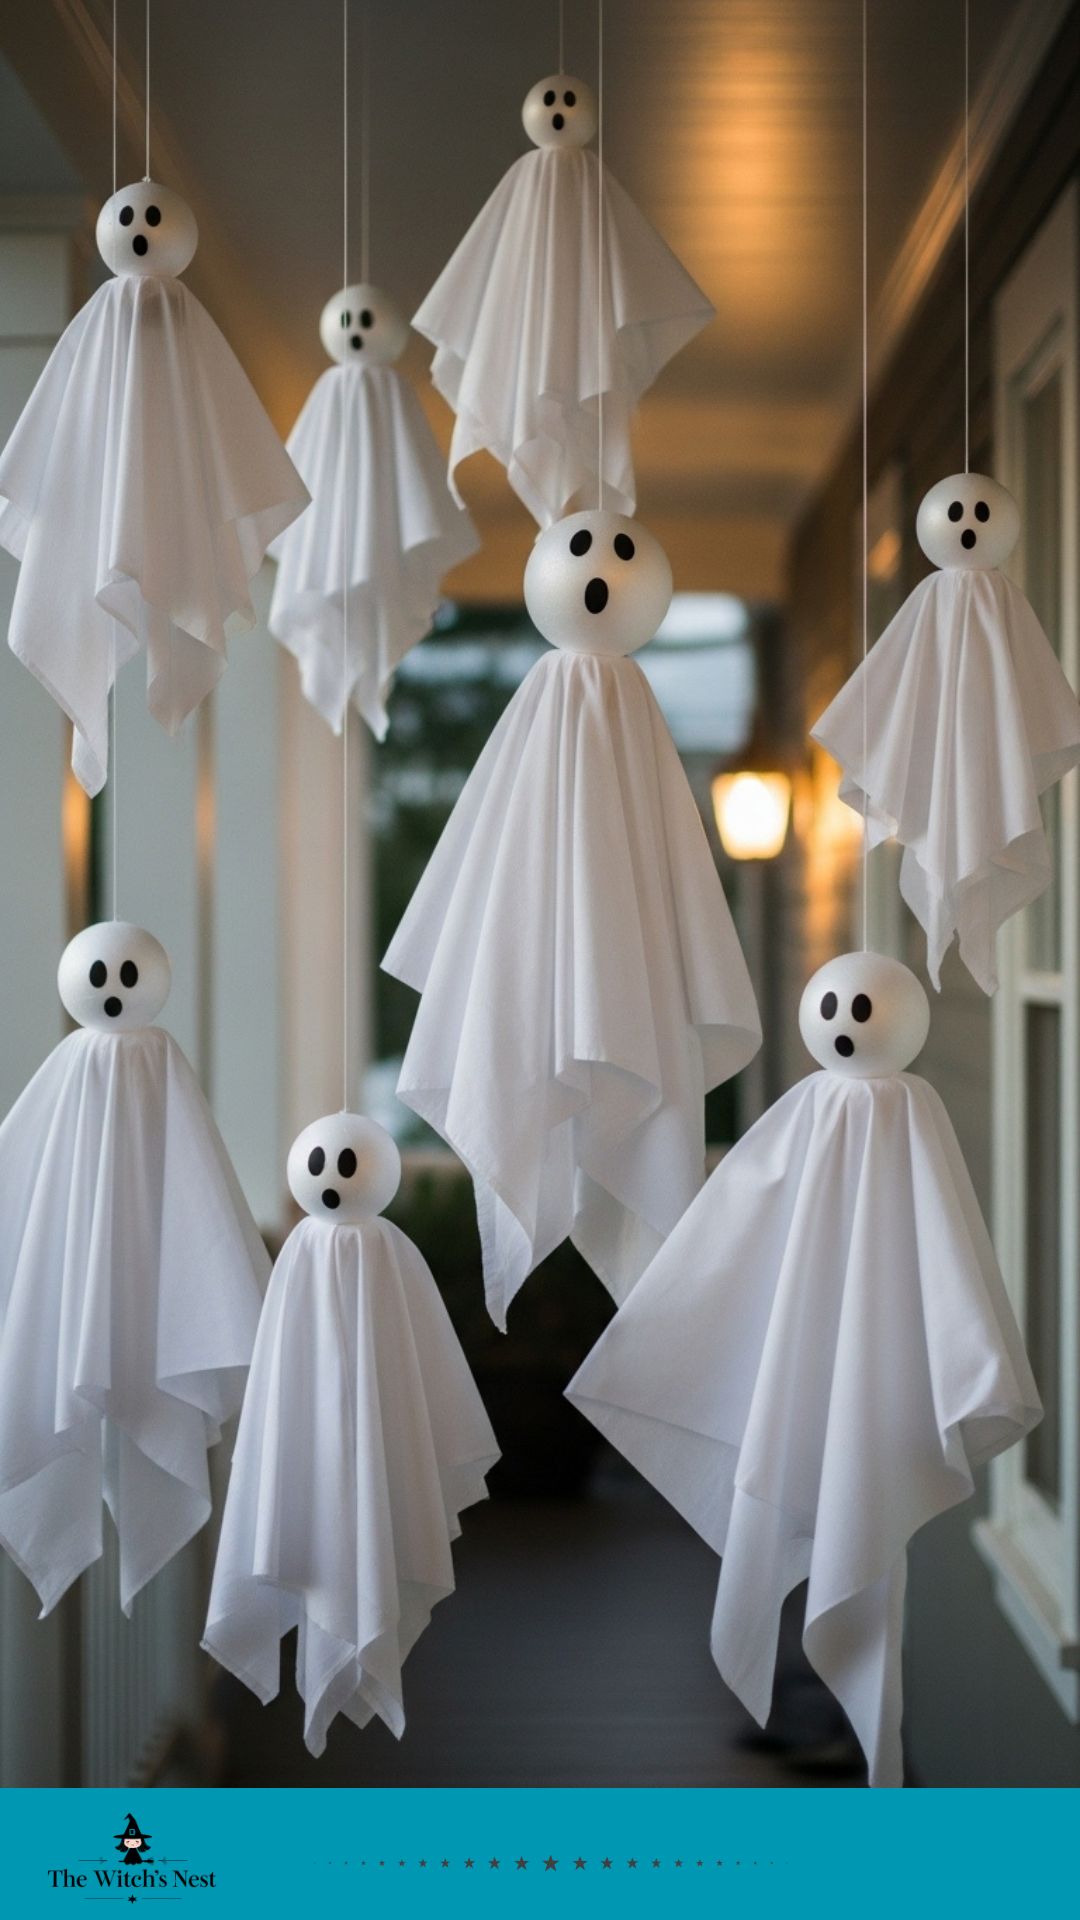
13. Hanging Ghosts from Sheets
Classic and always spooky.
You’ll need: old white sheets, foam balls or balloons, string, black marker.
Steps:
Place ball or balloon in the center of the sheet.
Tie around it to form a head.
Draw a face and hang from the ceiling or tree.
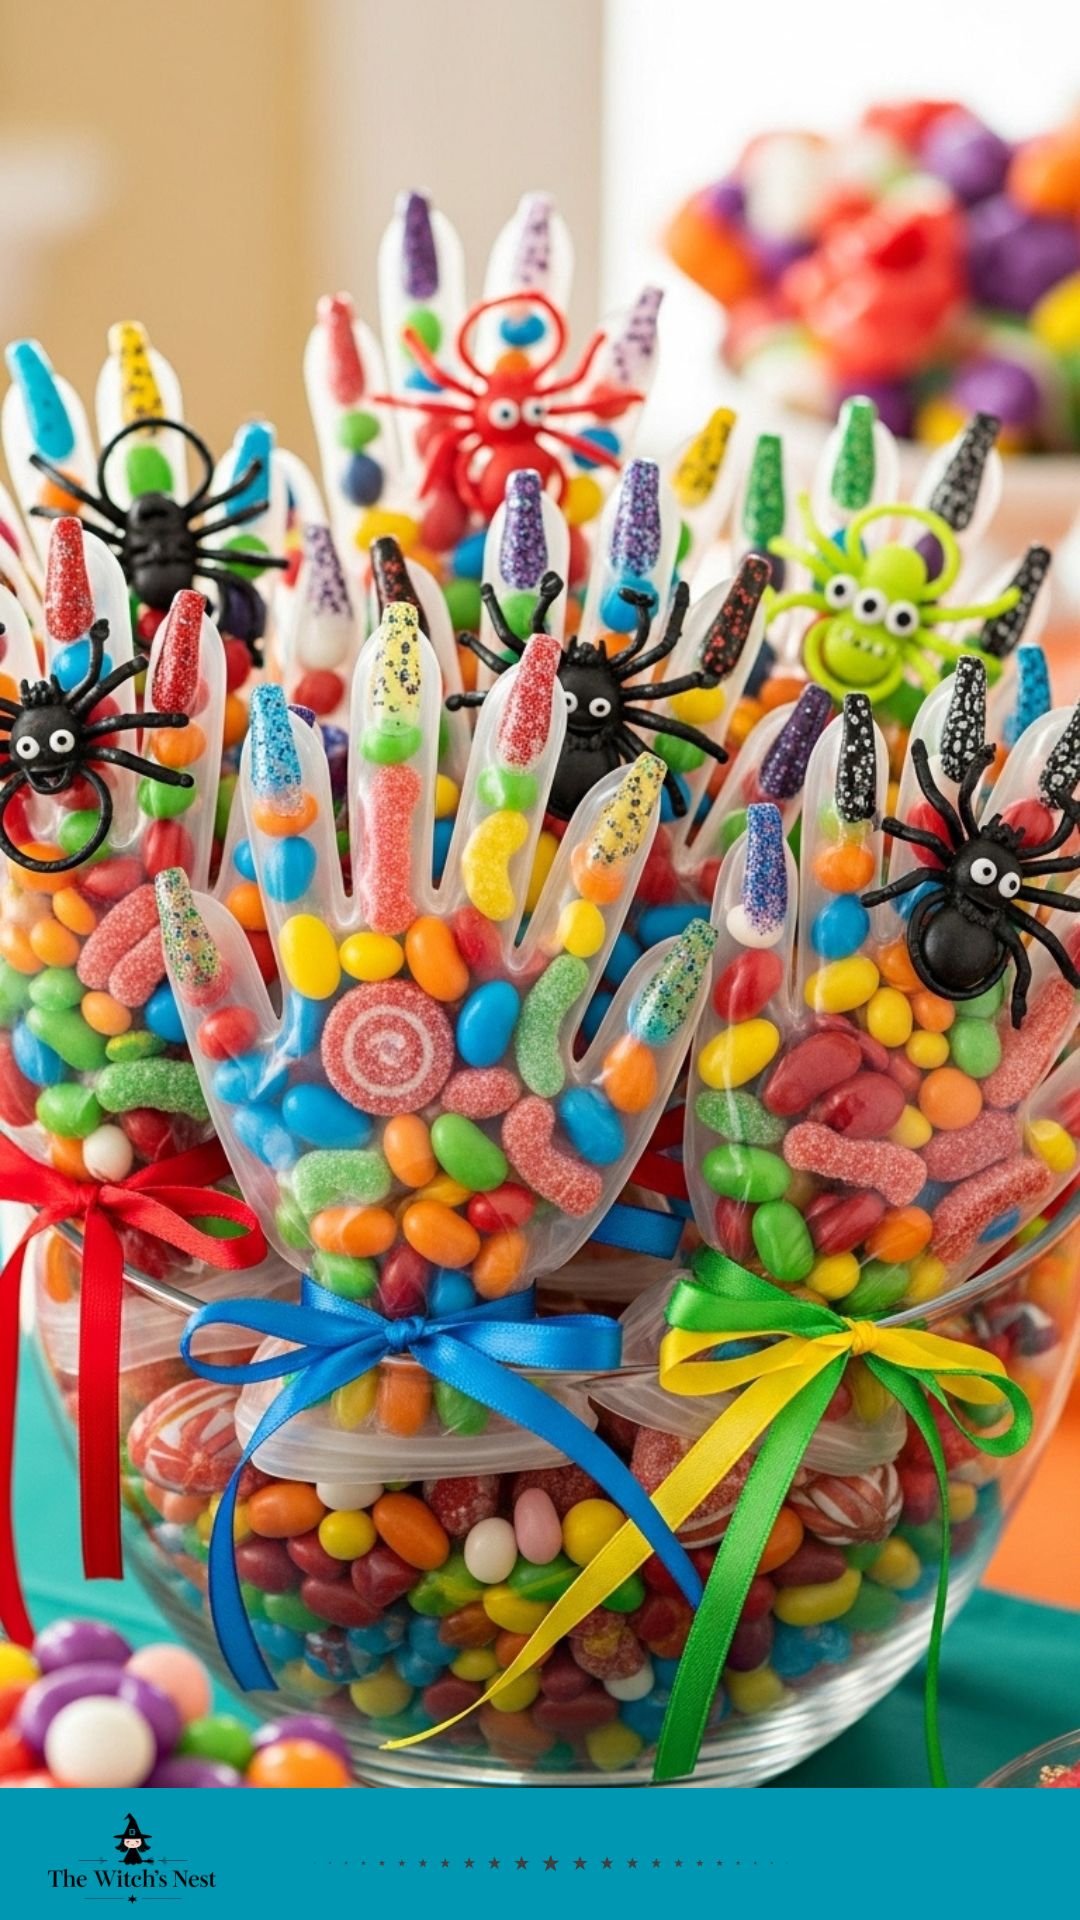
14. Candy-Filled Monster Hands
Great for parties or trick-or-treat favors.
You’ll need: clear gloves, candy, rubber bands, fake nails or spider rings.
Steps:
Fill fingers with small candies, hand with bigger ones.
Add a ring or plastic nail.
Seal and tie with ribbon.
15. Pumpkin Balloon Garland
Colorful and fun, especially for kid-friendly spaces.
You’ll need: orange balloons, black marker, string, tape.
Steps:
Blow up balloons and draw jack-o’-lantern faces.
Tape to a string in a row.
Hang above a doorway or window.
🧡 Why DIY Halloween Decor is So Worth It
Aside from saving money, doing your own Halloween decor brings a whole different kind of magic. You get to be creative, involve your family or kids, and create something totally personal.
Plus, it’s sustainable. Repurposing, recycling, and using natural materials is much friendlier to the planet—and to your budget.
And let’s be honest… there’s nothing like someone asking, “Where did you buy that?!” and proudly replying, “I made it!”
🎃 Final Thoughts: Time to Get Crafty, Spooky & Smart
Decorating for Halloween doesn’t need to come with a scary price tag. With a little effort and a lot of creativity, you can wow your guests, delight your kids, and keep your wallet happy.
I hope this list sparked some ideas and got your spooky juices flowing. Now tell me…
👉 Which of these DIY hacks will you try first?
Or do you have a Halloween trick up your sleeve you’d love to share?
Let’s chat in the comments—I’m always looking for new creepy-cute inspiration. 🧡👻

Deja una respuesta